Getting Started with Signed Documents and Liability Forms

Before you dive in
Have any liability forms you have previously used handy so you can easily copy and paste, or type, them into the WrestlingIQ document editor.
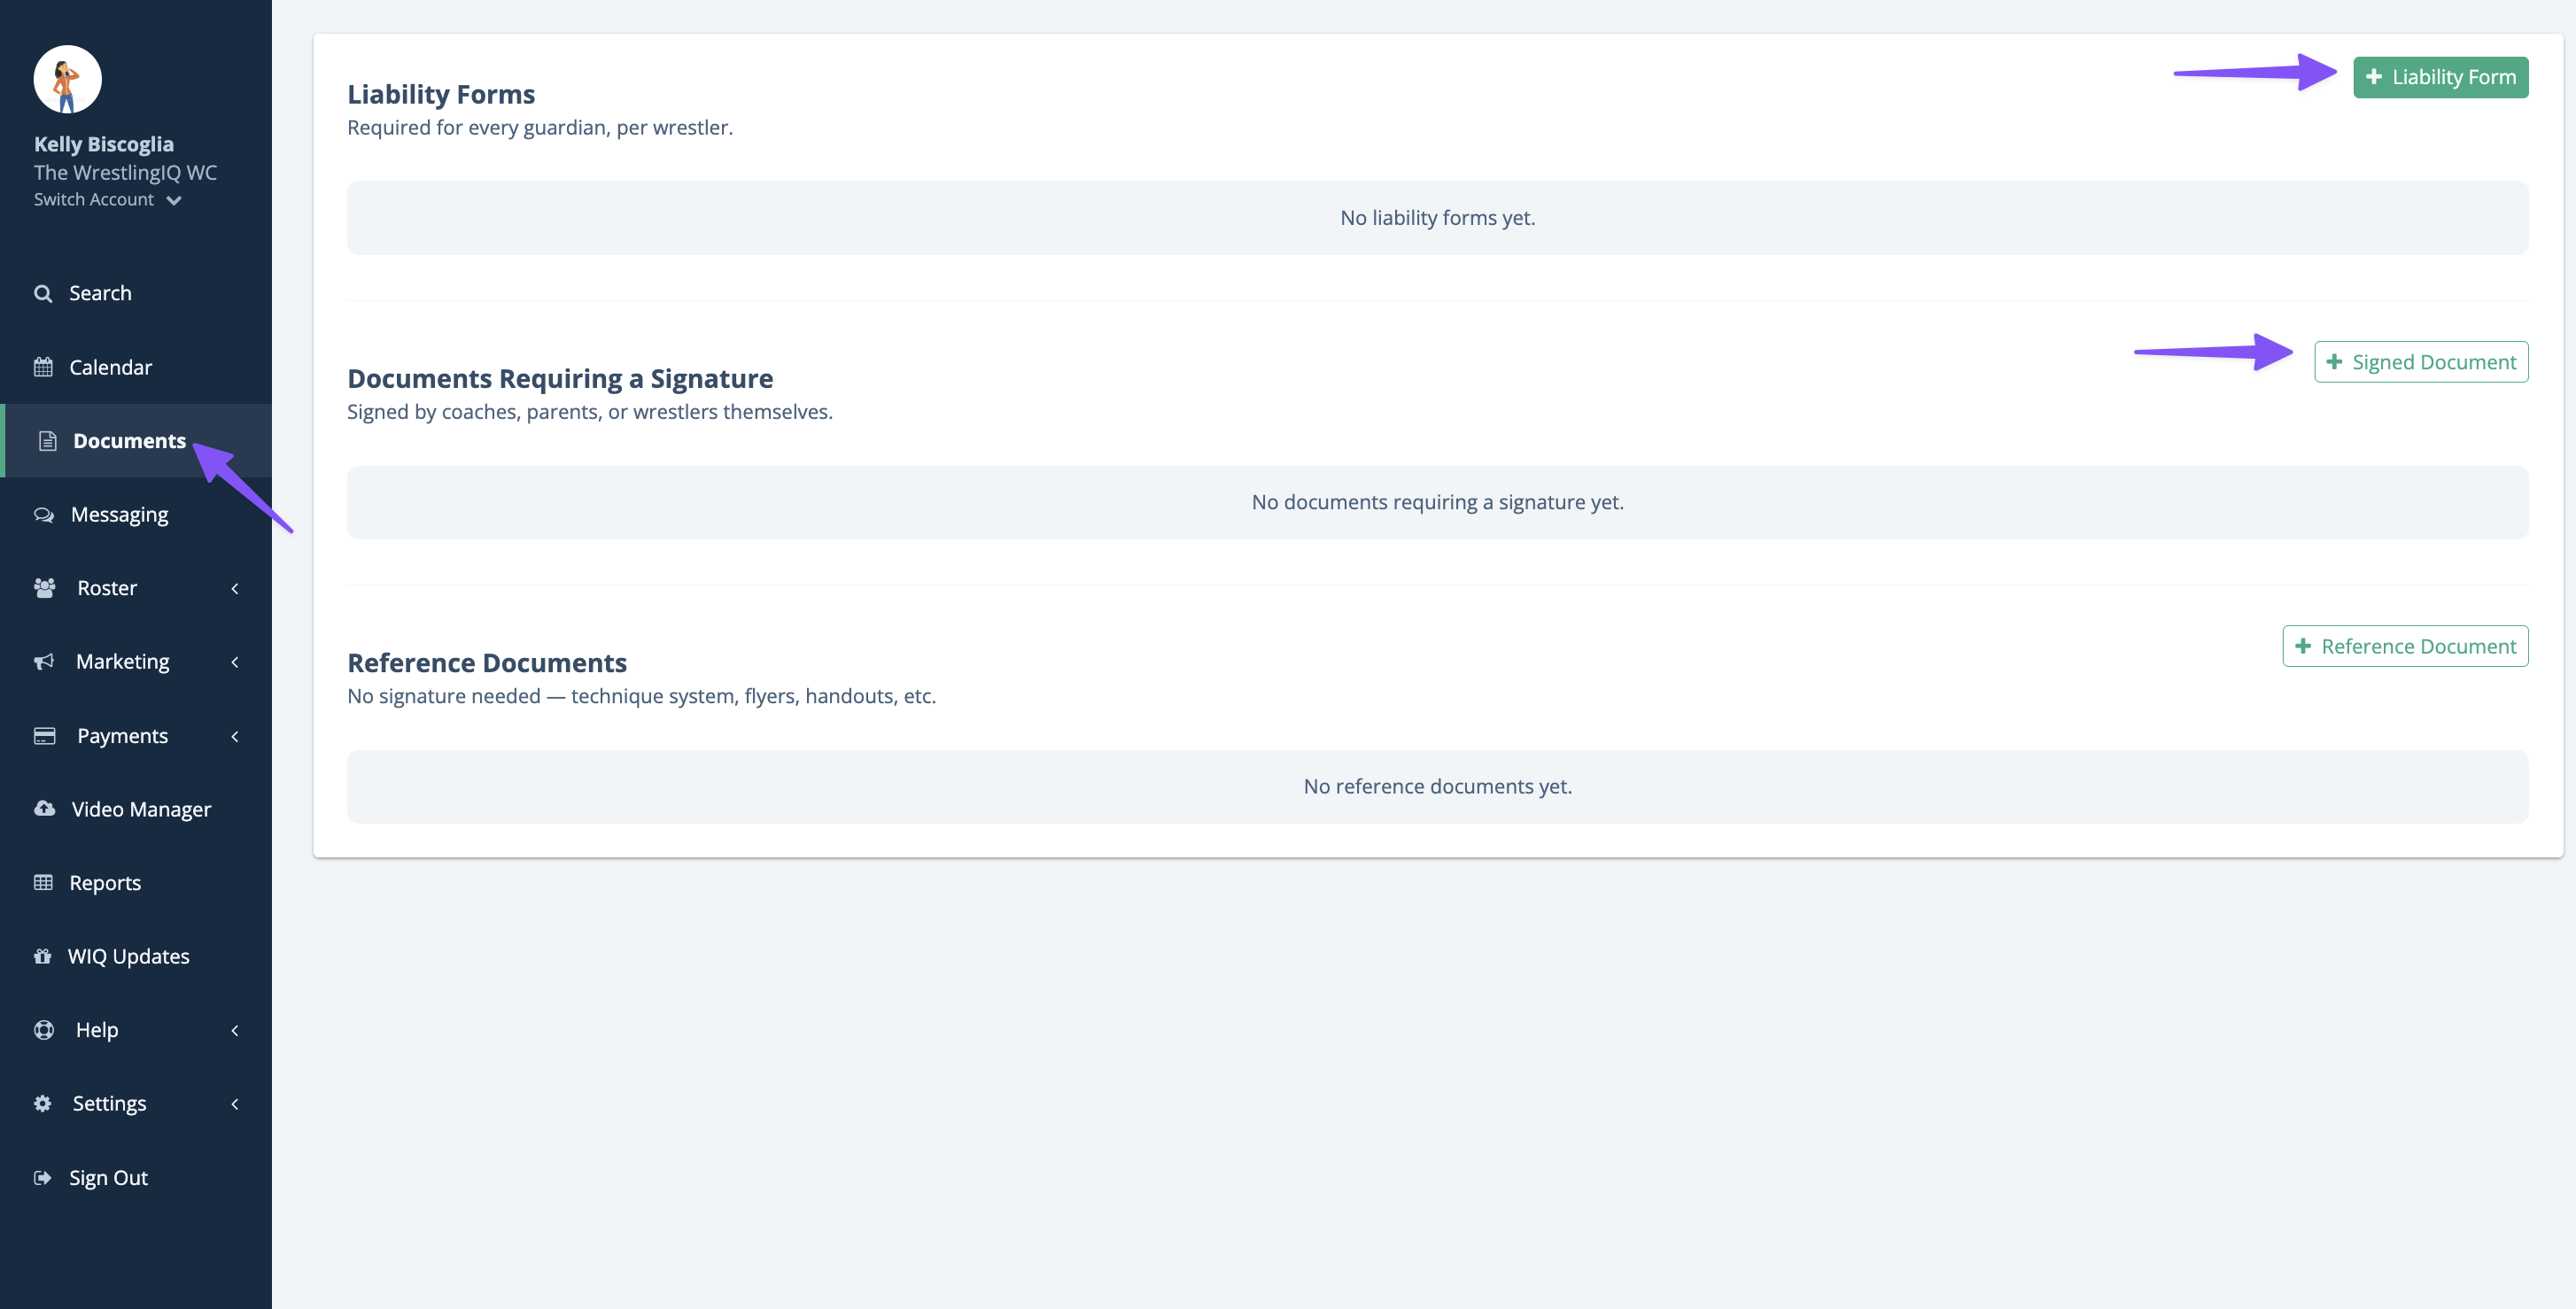
1. Navigate to the Documents page and decide on the form type
As an admin, go to the Documents page. There are two document types where signatures are collected, Liability Forms or Documents Requiring a Signature. Learn more about the different document types here.
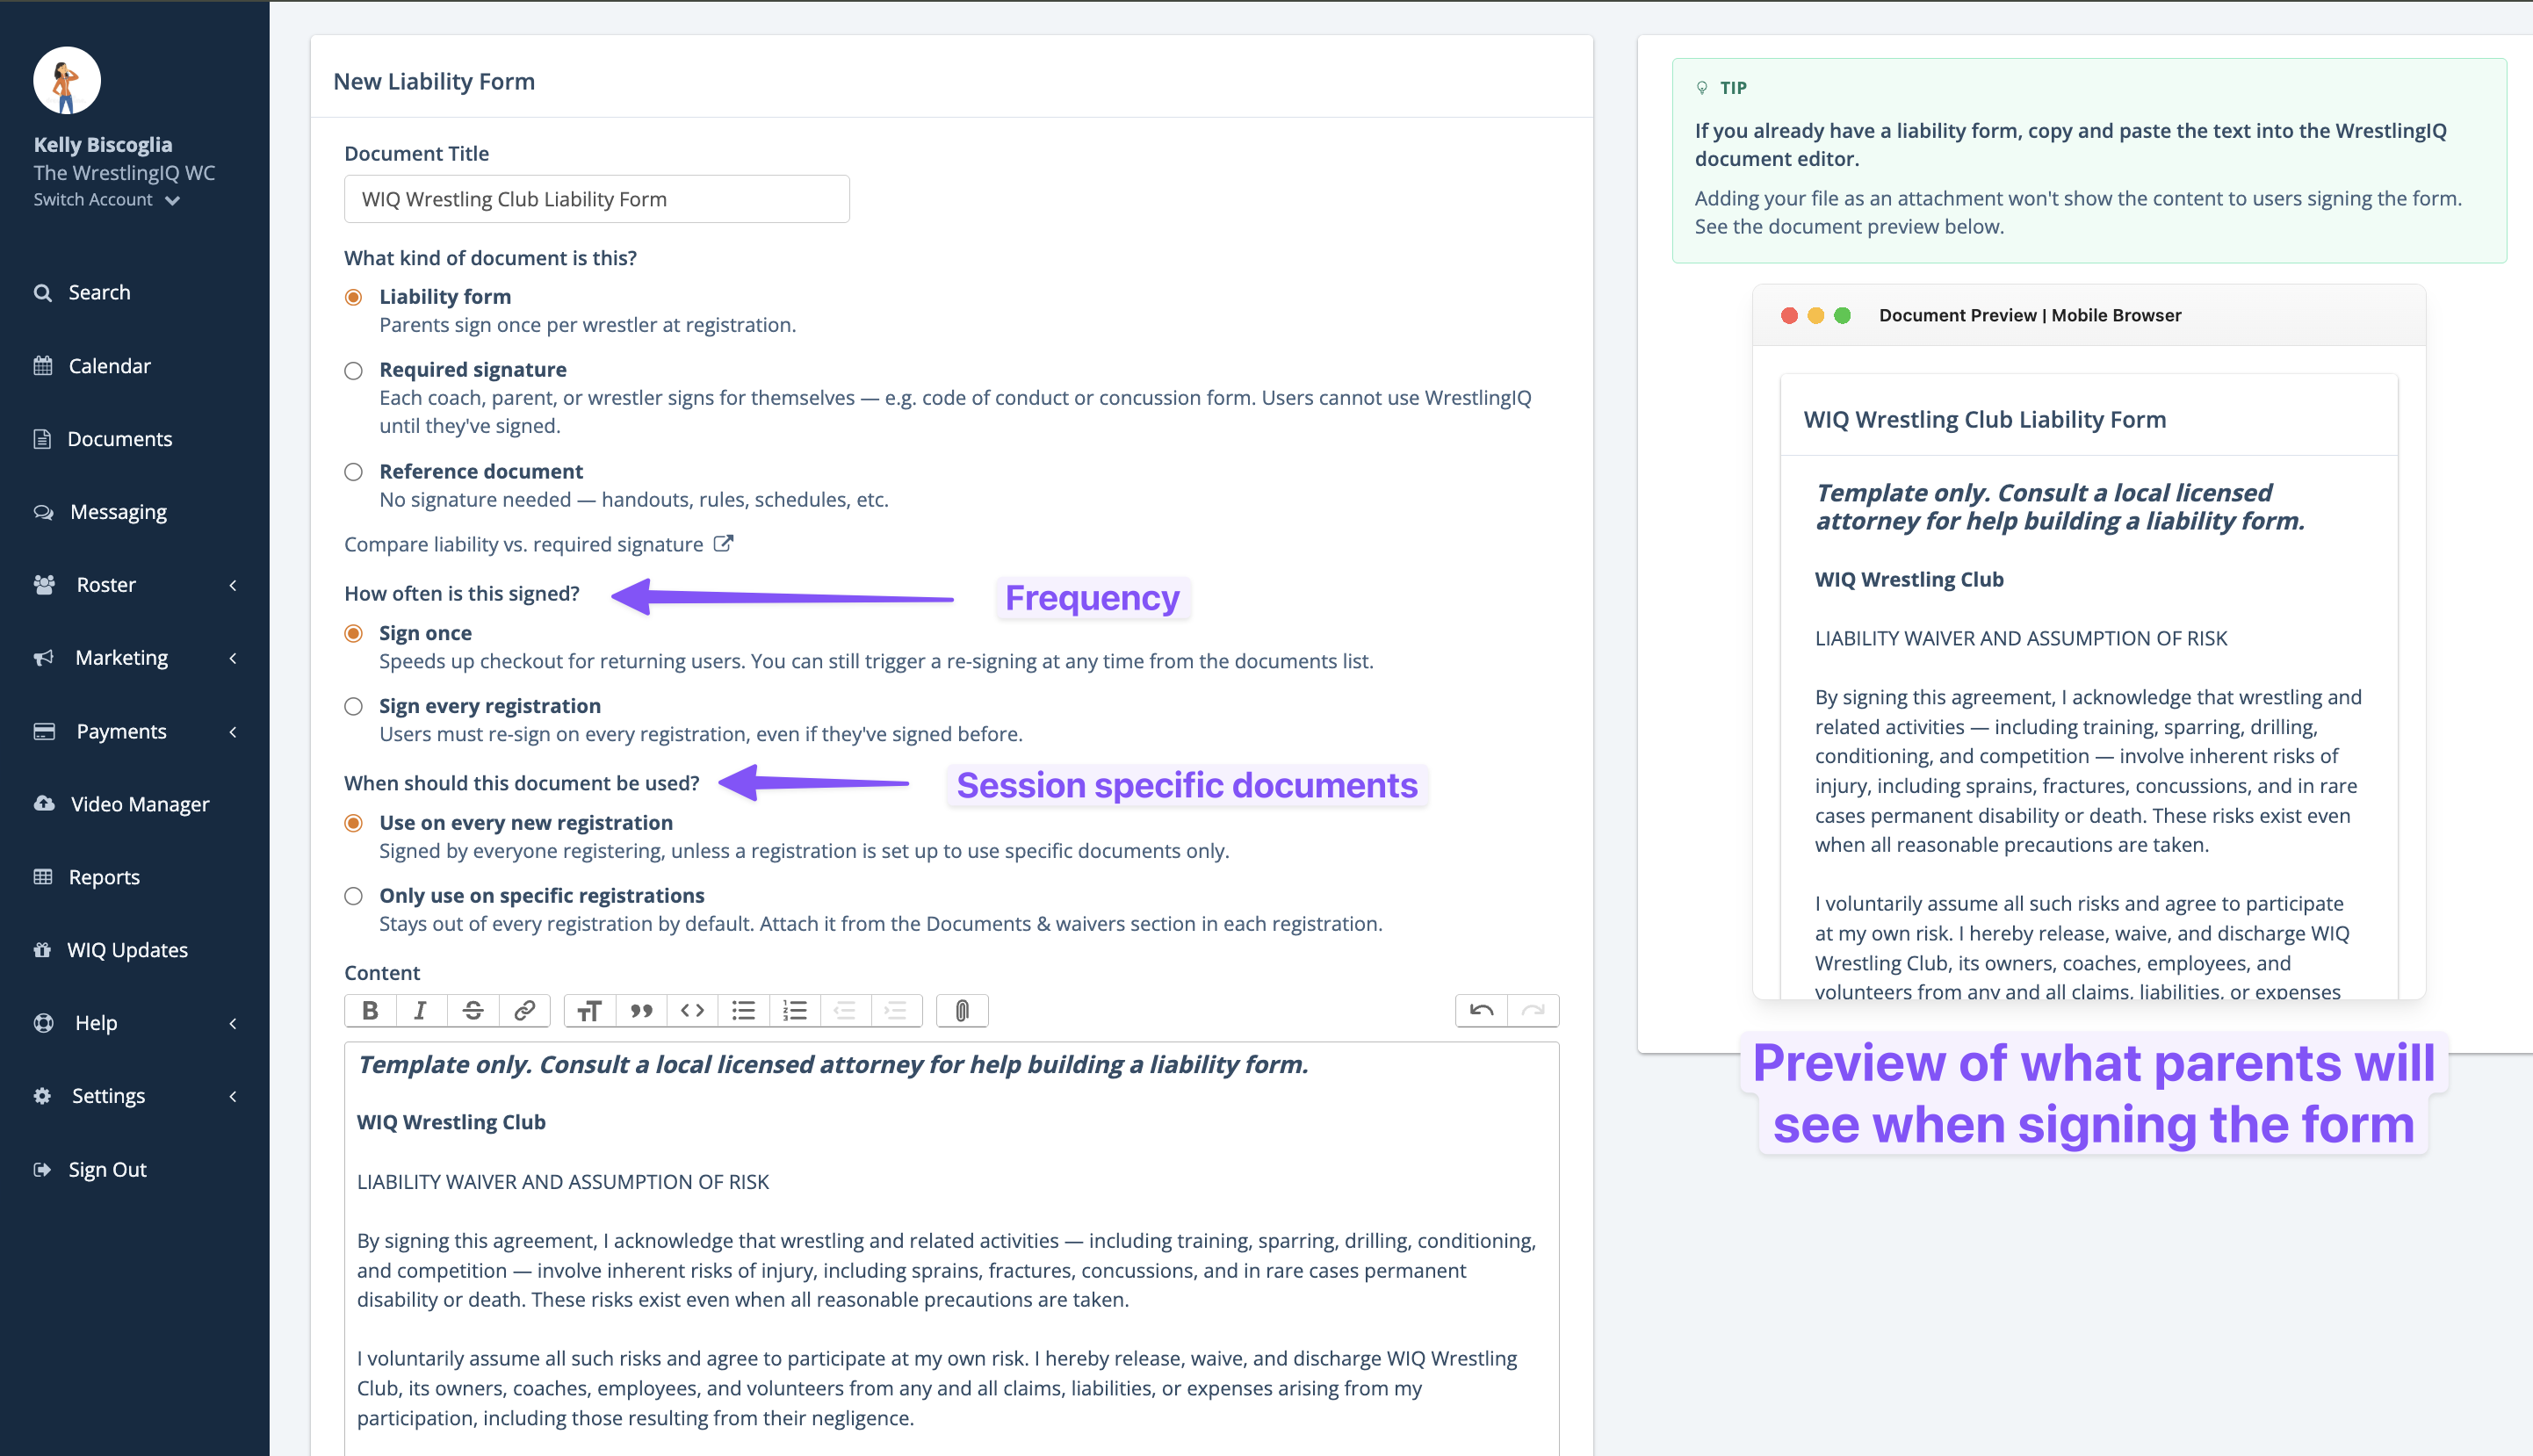
2. Create a document
Note: If you already have a liability form, copy and paste the text into the WrestlingIQ document editor. Adding your file as an attachment won't show the content to users signing the form.
The document builder allows you to style your form in multiple ways, including adding headlines, lists, and more. You can paste the document in from Google docs or Word and it will do it's best to retain common formatting.
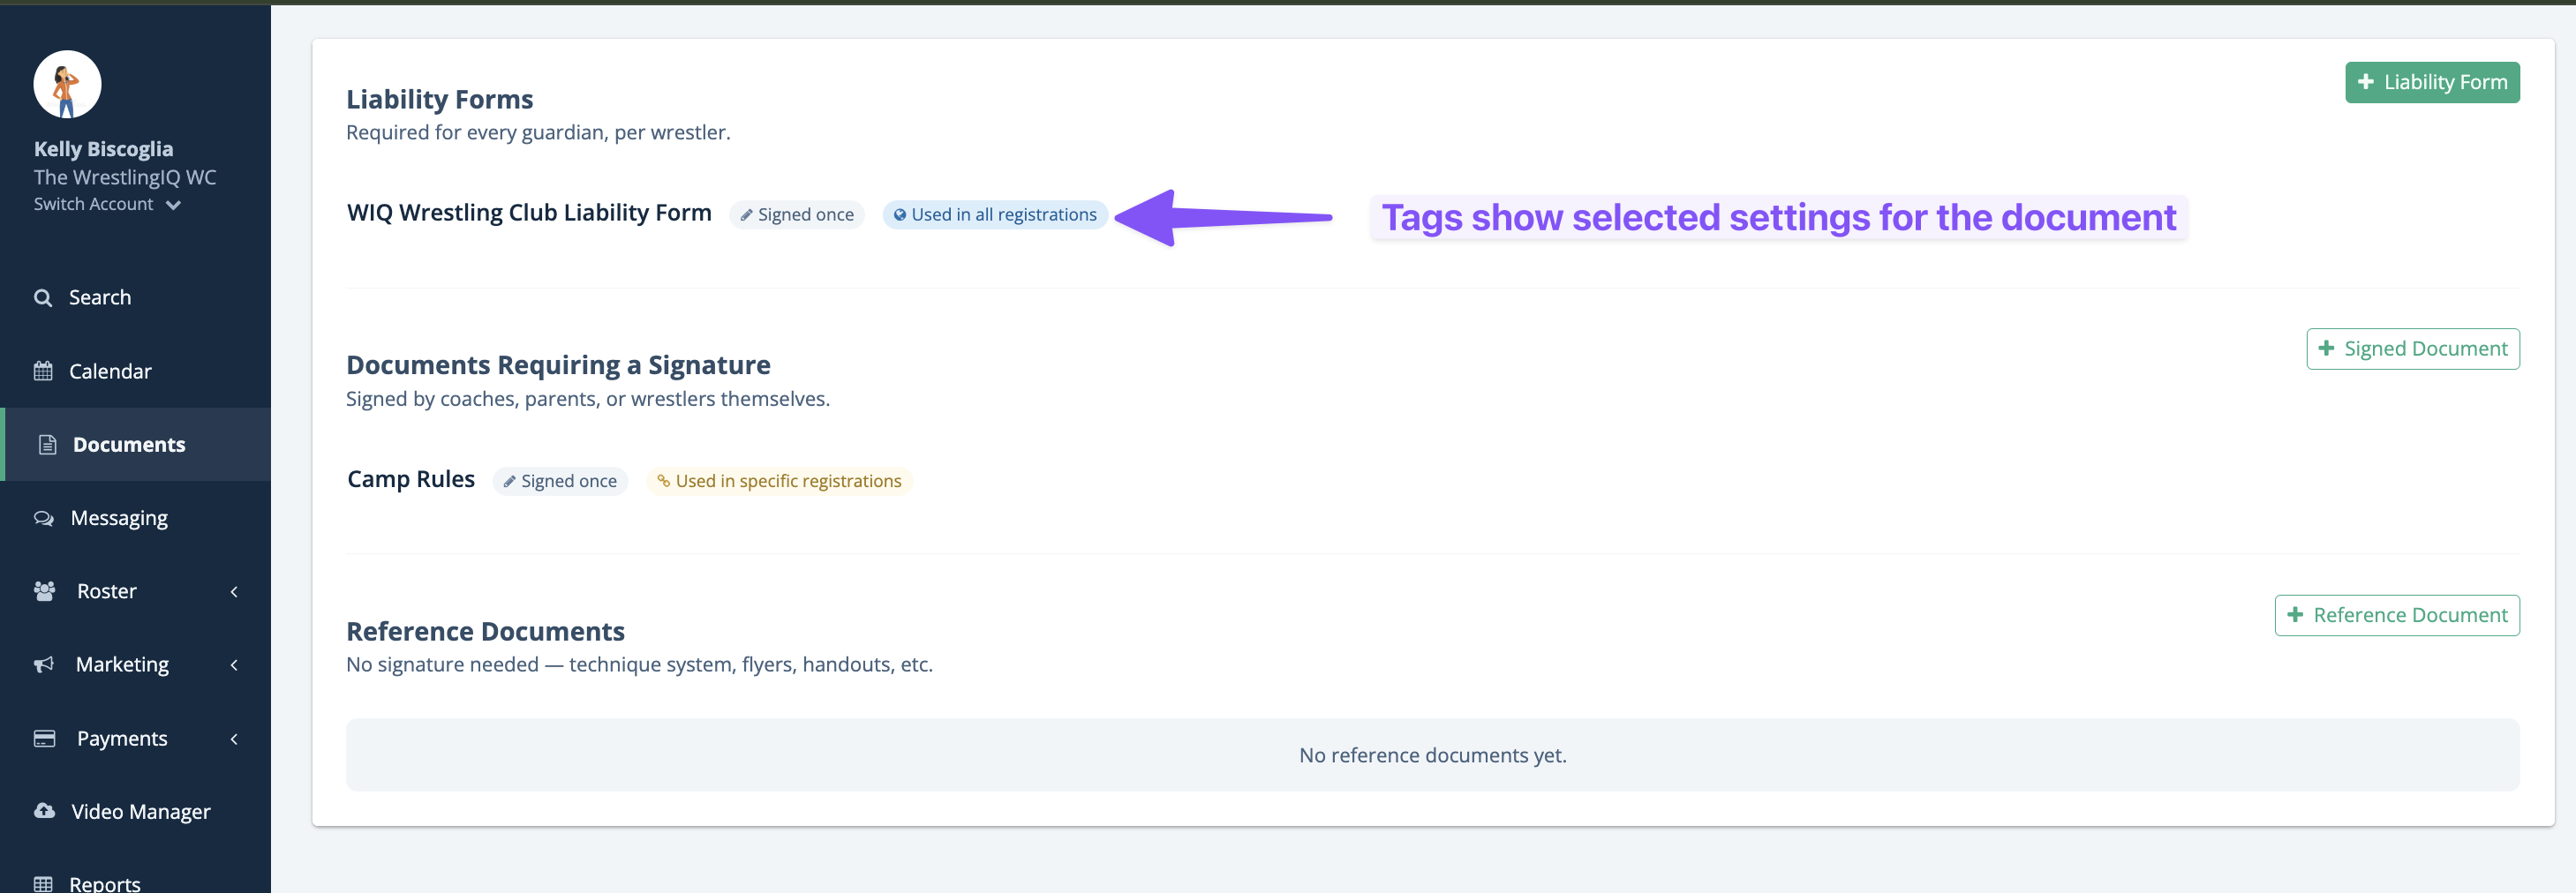
Additional settings for documents:
- Frequency: Set a liability form or waiver to be signed just once per wrestler or require re-signing each time they register.
- Session-specific documents: Attach documents to specific registrations instead of every session on your team. Great for waivers or forms that only apply to certain programs.
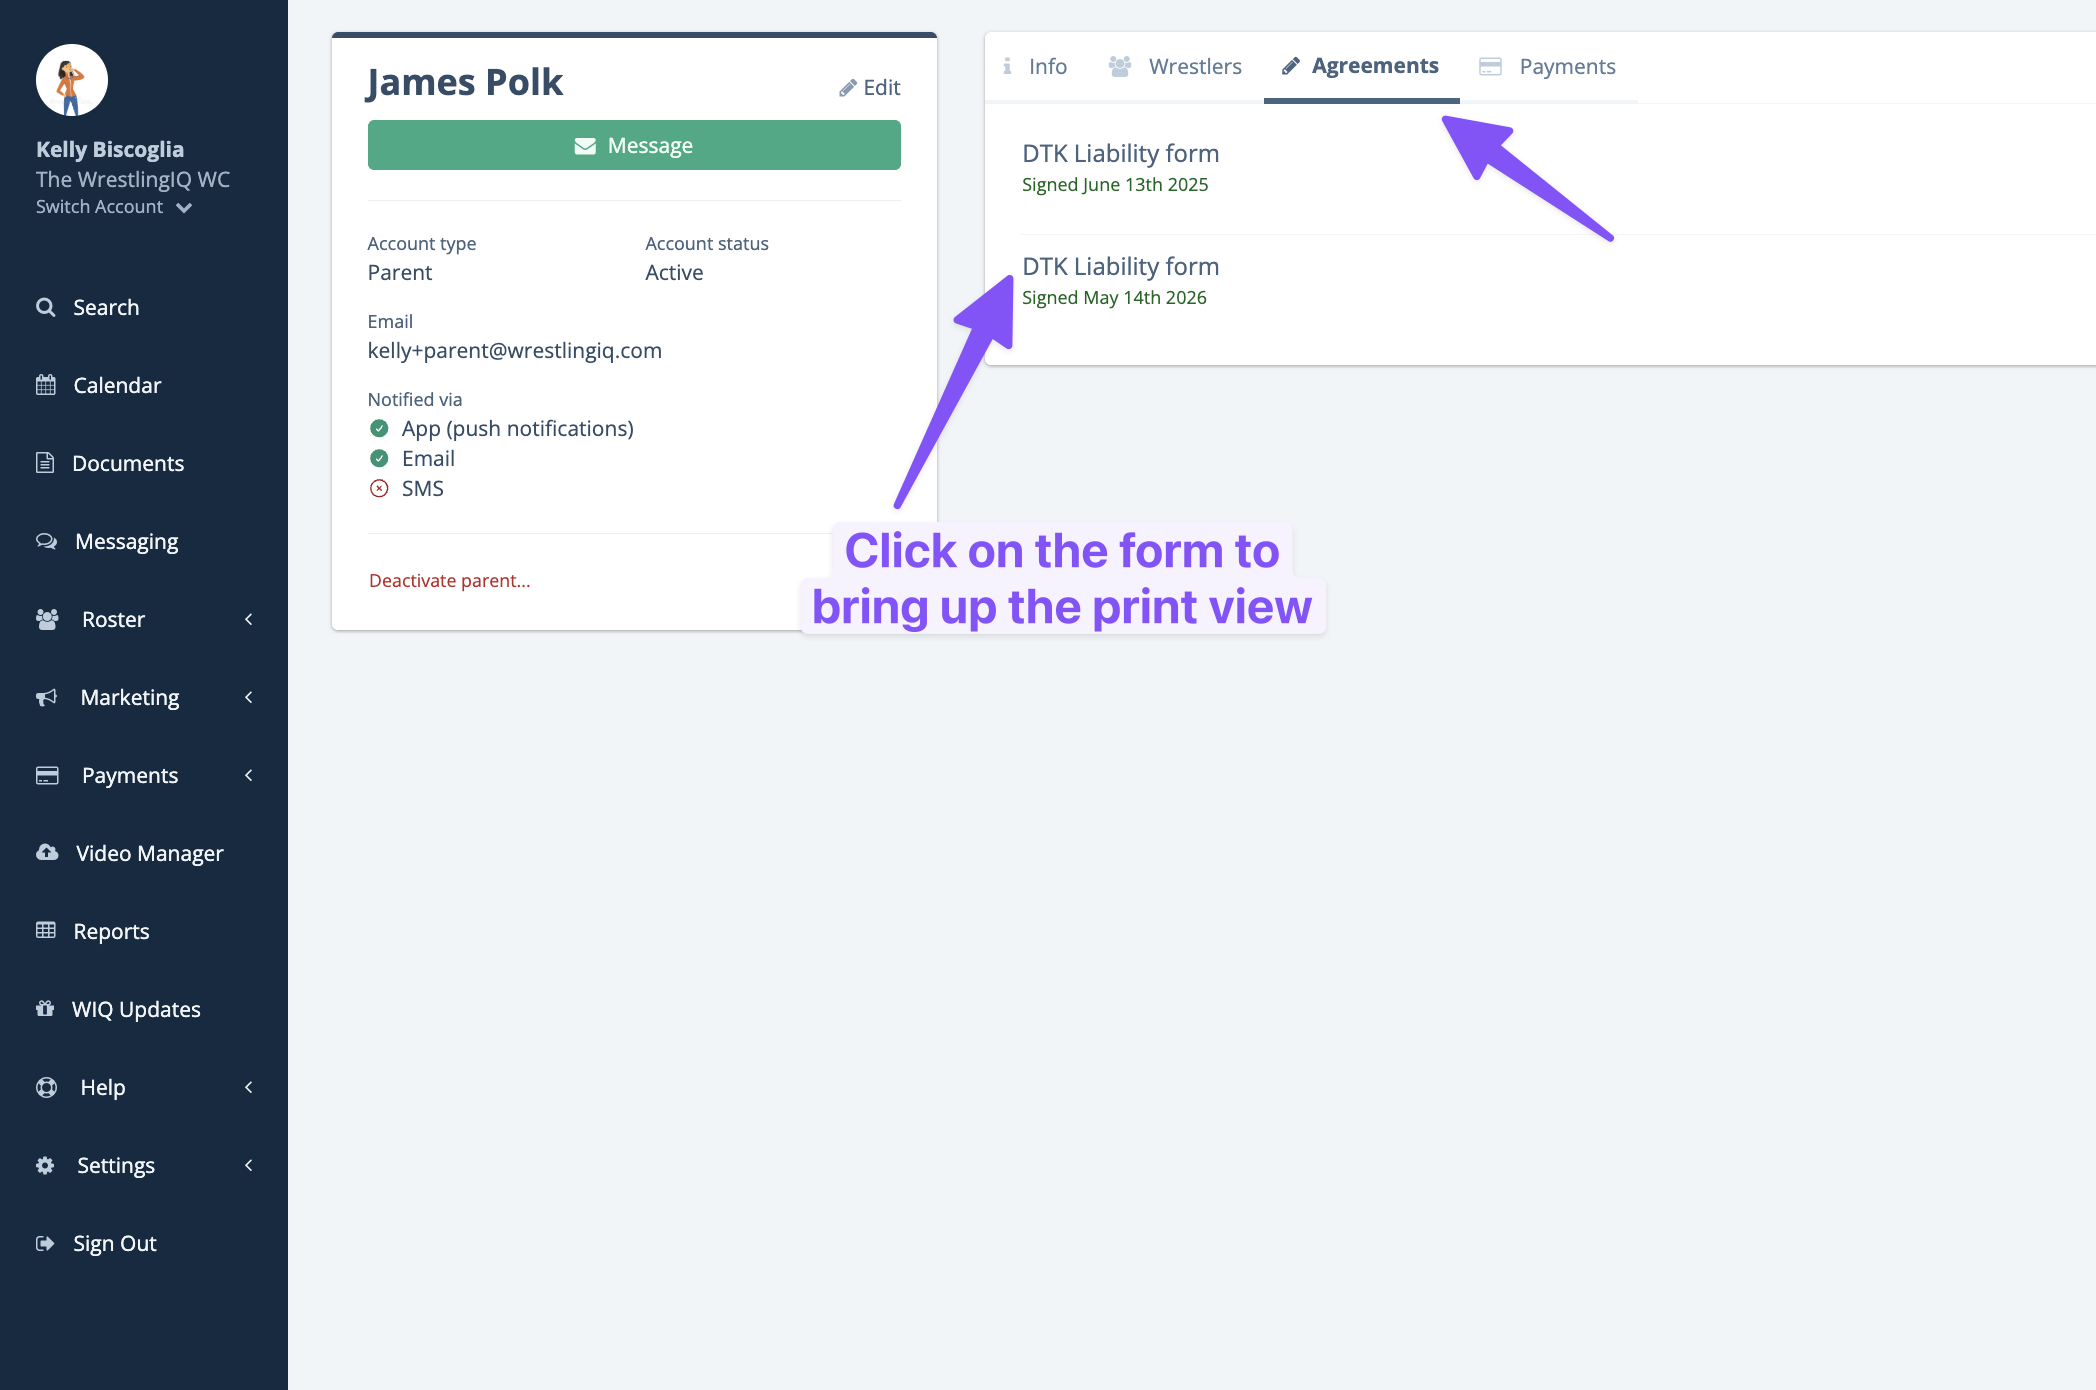
3. Viewing signed documents
If you want to view the documents that have been signed, you can do so by viewing either the parent or wrestler's profile in WrestlingIQ. Clicking on any of the forms will bring up the print view of the form, which contains the electronic signature, names, and when they signed.